Featured

Welcome


New Postcard

Creative Statement

I have a natural ability when it comes to using a sewing machine and feel very confident when using one. I have great control when creating textiles achieving great detail in these designs. I love to use my sketchbook to gather items and drawing that will help inspire my work further. I then use these to draw onto fabrics and then use a sewing machine to draw these designs with stitching. I have recently enjoyed creating three dimensional objects out of fabric. My recent collection was inspired by a trip to St Fagan’s. This led me to the collection of making an afternoon tea set including tea cups, cake stands, sandwiches, Welsh cakes and a table cloth. I very much enjoyed this and is something I hope to continue in the future. I made all my own patterns to create the tea cups that I have made. I have had a wonderful transformation each time I made one of the teacups. I have recently in the past year been introduced to natural dyeing which has become a big influence in my work. I have always enjoyed experimenting with fabrics and techniques and I feel that this technique you are always experimenting with new dyestuff to create beautiful dye for fabrics. The environment has become a huge importance in my work and I consider everything I do. I try my hardest to find fabrics rather than printing or buying my own to help the environment. The textiles industry has huge implements on the earth and I love my practice and want to create a sustainably way for me to continue my practice as well as helping the environment.

Featured

First blog post

This is the post excerpt.

Hi I want to welcome you to my blog. This is a way I can bring you along with me on my university jounry and what I am going to be creating along my three years. I will be trying to blog daily if not every couple of days so feel free to check back in weekly. Enjoy my work and watch how my textile design develops and grows over the next three years. I hope you enjoy all of my projects.

IMG_2942.jpg


Final Outcome: Reflection

Overall, I have really enjoyed this project and this brief, especially because I have felt I have been able to explore my creative maker side more as my first year in university was in the maker course. I have been able to find a great balance between my love of textiles and making to create this current project.

The tutors have been very supportive in my approach to this brief and have really helped me develop my skills as a textiles artist and textiles maker. The feedback I have received from the half way point was very positive and has given me a lot of confidence in my textiles making approach. Although there was positive feedback I was also given informative development targets to hit to improve my installation piece further.

With the written feedback from my tutors I have been able to make a plan of action for where I wanted to develop my work further. I was able to create a list of all the things I hoped to achieve between the feedback and the submission date.

As of now I feel I have managed to do more than I expected to do in the time I have been given to develop my work. Even with the current situation with Covid-19 I have managed to recreate all of my afternoon tea set as the other tea set is currently in the university where I am not able to access it.

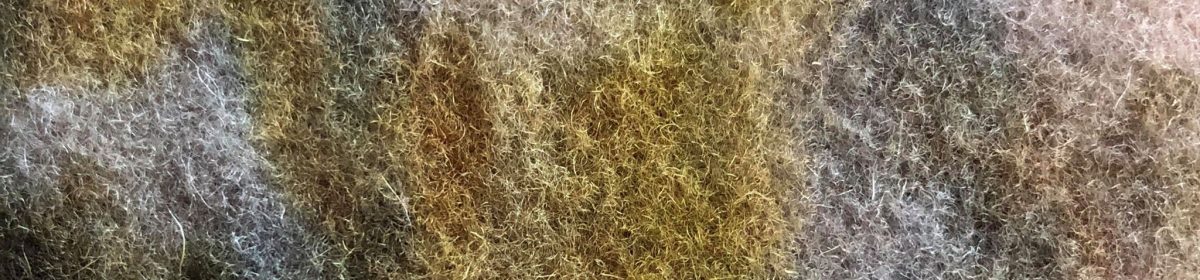
I am incredible pleased with how I have managed to balance out my time with doing my consultancy work but also creating and developing my FMP at the same time. I am happy that I have been able to introduce my own dyed fabrics. Before hand in, in December the tutors spoke to me about considering designing my own fabrics and having them printed, which is something I wasn’t very interested in doing as I like my work to be eco friendly. Even though I have created my own patterns I have created my own fabric by using eco dyeing which has created lovely patterns with different shades of green. This fabric I believe has been very successful with making these into teacups. I am happy that I have also been able to keep the green as one of the colours for the tea cups to still have that link with the Welsh Flag.

When I am looking back and comparing my other tea set with this one I am able to see a huge difference in my development from then. Even looking back at the start of term one when I first started creating my tea cups, my making and refinement of my teacups has improved with each tea cup I have made over the course of the year. In total I have made around 15 tea cups and each one you can see a development.

The past couple months has been hard for me to stay focused with my projects with the lack of equipment I have been able to access and order due to longer deliveries and some of my orders still not arriving, but I have remained focused and when I am lacking in motivation in this project I have looked at my FMP and the same with that also.

Overall, I am very pleased with how I have developed in myself. I was very confused and unsure where and who I was in my creative journey and believe I am not confident in saying that I am a textiles maker and this is something I do well and hope to continue doing.

Afternoon Tea: Set Up

Now that I have remade and completed all the components of my afternoon tea I needed to look at setting it up ready to display. I had a play around with different positions. I have used a table that I found in the apartment building as it is the right size so that the components of my afternoon tea look like they fill the table, but not too much that it is cluttered.

I am very happy with how the setting looks and how there is the perfect amount of components on the table.

Table Cloth

When looking at creating the table cloth again I did have to buy this from Asda and resize this as I have struggled to get hold of more fabric with the current situation.

I am going to machine stitch into the table cloth again, as the majority of my piece is 3D and I want to be able to include some 2D elements to the piece. I want to, instead of creating 3D spoons and butter knifes I am still using machine embroidery to stitch them into the table cloth.

Before I did include some writing going along the bottom of the table cloth but this time I haven’t been able to due to lack of the thread I have used previously and lack of embroidery thread in general. Although I did like this element of the design it isn’t something that I miss and I think this works just as well without it.


Sugar Pot: Reflection

After a could of experiments and time slipping away from me rather fast I haven’t been able to develop this idea any further. Although my two sugar pots haven’t been failed attempts I am not 100% satisfied with them and would prefer not to include these in the final piece at this time.

When setting up my finish piece I will consider adding this in to see how it will look but I am not committing to have a sugar pot in my little installation piece at this moment in time due to not being able to develop this anymore than I have.

Sugar Pot: Attempt Two

Now that I have attempted my first sugar pot there was stuff that I wanted to change and sort out certain aspects of the design. This time I think I’m going to look at using all the components of my tea cup patterns as I think the sugar pot on my previous attempt was too small I also want to include some or of lid that would cover the sugar.

  • Firstly, I drew and cut out all of my pattern pieces. Adding a 1cm hem allowance.
  •  I then iron the fold for the seam allowance so when I attached all of the components together this will be sewn down as well.
  • Once I had done this, I got the bottom piece and then a top piece and pinned these together so I could then sew and attach the two pieces together. I repeated this for all five pieces until they were all attached like the images below.
  • Once I had attached all the top and bottom pattern pieces together I then pinned these together and began sewing them together. Once both of them had been completed and now created a circular shape of a sugar pot,  I turned the sugar pot the correct way to check that the stitching was okay and moved on.
  • This time I used the lovely silver ribbon, shown with the images below.
  • I used then used the silver ribbon to create the bottom of the sugar pot I made a circular shape with the ribbon and stitched this together. To make it easier for me and so that my sugar pot looked professional I did add some hot glue to attached the bottom to the sugar pot, which has worked very well. It is also more hardwearing than just trying to stitch it on.
  • I then began looking at adding the lining of the sugar pot I have continued to use the plain white polyester fabric as it has proven to uphold all my previous attempts. I’m going to do six lining pieces again as this has worked best with my other cups rather than just using five. Once I drew them out and cut the pieces out, I began to sew these together as well.
  • I then placed the lining inside of the pot to make sure that it fitted in nicely with the outer pot pattern pieces. Using pins I pinned the outside and inside together so then I can sew these all together. I used a light green machine thread to do this.
  • Next was looking at the handle. This time I also included the lovely silver ribbon. I used a little hot glue to attached the top half of the handle into the seam of the teacup, this worked very well in comparison to me sewing it on like previous attempts. I then brought the ribbon down to see where I would place the bottom part of the handle and cut the excess away and then used hot glue again to attach the bottom half of the handle to the sugar pot.
  • I then wanted to create a lid for the sugar pot. I used one of my pattern pieces to draw out to circle one in the eco dyed fabric and one in the white polyester fabric. Once done I cut these out.
  • I then used some of the silver ribbon to go in-between the two circle to create a decorative rim to then lid. I used hot glue to attach this to the green part of the lid.
  • I also looked at adding a little handle to the lid by creating a French knot, as you can see from the images below.
  • Once I had completed all of these things I then adding a little wadding in-between the two lid pieces and pinned them all into place before using the sewing making to stitch them all together. I used a zig zag stitch instead of a straight stitch to be more decorative.

Here in the images below is the final outcome of this sugar pot. I am happy with how this one looks although I am still unsure how I feel about the lid to this but without the lid the sugar pot looks too similar to the tea cups.

Sugar Pot: Attempt One

I have wanted to create a sugar pot to go only side all of my afternoon tea set for awhile but before the first hand in I wasn’t able to as I had been admitted to hospital and didn’t have much time to try and develop this piece as I would have wanted. Now that I have got some time I want to try and create and develop one.

Before when I was experimenting with different lips to my tea cups one of my attempts actually looked more like a sugar pot than a tea cup. This is when I decided to look at using the my same patterns I created for the teacups for the sugar pot.

  • Firstly, I drew and cut out the top and bottom pattern pieces that create the outside of the cup. I drew and cut out four tops and four bottoms. I added a 1cm seam allowance to the top parts of the sugar pot. I wanted to try and make this a little smaller so you are able to see the difference between the sugar pot and tea cups.
  • I then iron the fold for the seam allowance so when I attached all of the components together this will be sewn down as well.
  • Once I had done this, I got the bottom piece and then a top piece and pinned these together so I could then sew and attach the two pieces together. I repeated this for all four pieces until they were all attached like the images below.
  • Once I had attached all the top and bottom pattern pieces together I then pinned these together and began sewing them together. Once both of them had been completed and now created a circular shape of a sugar pit,  I turned the sugar pot the correct way to check that the stitching was okay and moved on.
  • This time I changed the lip of the sugar pot . I didn’t have any of the cord I had previously to make the teacups and managed to get this silver ribbon, so that the sugar pot and cups would match I used this.
  • I used then used the silver ribbon to create the bottom of the sugar pot I made a circular shape with the ribbon and stitched this together. To make it easier for me and so that my sugar pot looked professional I did add some hot glue to attached the bottom to the sugar pot, which has worked very well. It is also more hardwearing than just trying to stitch it on.
  • I then began looking at adding the lining of the sugar pot I have continued to use the plain white polyester fabric as it has proven to uphold all my previous attempts. I’m going to do five lining pieces as I have taken one pattern piece away from the outside of the sugar pot as well. Once I drew them out and cut the pieces out, I began to sew these together as well.
  • I then used the same ribbon for the rim of the pot also as before I had the cord going around the rim of the cup. I put this in place and then placed the lining inside of the pot to make sure that it fitted in nicely with the outer cup pattern pieces. Using pins I pinned the outside, inside and the ribbon together so then I can sew these all together. I used a light green machine thread to do this.
  • For the sugar pot I did not need to include a handle.

Here in the images below is the final outcome of this sugar pot. This is a good start to me developing my sugar pot as I have already made the decision to maybe look at using all the original components of my tea cup pattern pieces rather than the four like I have for this. I always am considering adding some sort of lid as well as my tea set has a lid for its sugar.


Tea Cup: Fifth Development

Now that I have been experimenting with eco dyeing and wrapping my dye stuff into my fabric I wanted to incorporate this into my consultancy work now as well. One of the colours I had chosen to use when creating my tea cups was a green to link in with the Welsh flag colours. To keep the theme running with this I wanted to use some of my fabric that I had eco dyed with using red onion skins. These fabrics have lovely shades of green in them and I think they will be perfect for this project.

  • Firstly, I did have to go back on how I had made my tea cups as it has been some time since I last made these back in November/ December time. As I knew I had a certain process how I constructed each section of the teacups.
  • I then drew and cut out the top and bottom pattern pieces that create the outside of the cup. I drew and cut out five tops and five bottoms. I added a 1cm seam allowance to the top parts of the tea cups also.
  • I then iron the fold for the seam allowance so when I attached all of the components together this will be sewn down as well.
  • Once I had done this, I got the bottom piece and then a top piece and pinned these together so I could then sew and attach the two pieces together. I repeated this for all five pieces until they were all attached like the images below.
  • Once I had attached all the top and bottom pattern pieces together I then pinned these together and began sewing them together. Once both of them had been completed and now created a circular shape of a tea cup,  I turned the tea cup the correct way to check that the stitching was okay and moved on.
  • This time I changed the way I made the cup. I didn’t have any of the cord I had previously to make the teacups. I went to a local shop that I knew supplied some crafty pieces and luckily they had a section with ribbons and cords. I found some gold cord but also this lovely silver ribbon, shown with the images below, I purchased both of these.
  • I used then used the silver ribbon to create the bottom of the tea cup I made a circular shape with the ribbon and stitched this together. To make it easier for me and so that my teacup looked professional I did add some hot glue to attached the bottom to the tea cup, which has worked very well. It is also more hardwearing than just trying to stitch it on.
  • I then began looking at adding the lining of the teacup I have continued to use the plain white polyester fabric as it has proven to uphold all my previous attempts. I’m going to do six lining pieces again as this has worked best with my other cups rather than just using five. Once I drew them out and cut the pieces out, I began to sew these together as well.
  • I then used the same ribbon for the rim of the cup also as before I had the cord going around the rim of the cup. I put this in place and then placed the lining inside of the cup to make sure that it fitted in nicely with the outer cup pattern pieces. Using pins I pinned the outside, inside and the ribbon together so then I can sew these all together. I used a light green machine thread to do this.
  • Next was looking at the handle. This time I also included the lovely silver ribbon. I used a little hot glue to attached the top half of the handle into the seam of the teacup, this worked very well in comparison to me sewing it on like previous attempts. I then brought the ribbon down to see where I would place the bottom part of the handle and cut the excess away and then used hot glue again to attach the bottom half of the handle to the teacup.

Here in the images below is the final outcome of this tea cup. I am very happy with the colour of the fabric and the change in fabric. I did like using the found fabrics but this way I am still being environmentally friendly by using eco dyeing but also the fabrics are now my own dyed fabrics rather than someone patterned fabric. I also believe that experimenting with this silver ribbon has paid off and has refined my teacup further than previously. I will continue to develop this to help refine my making even further.


Tea Cup: Fourth Development

I am now moving on from the third development of my teacups. That sample didn’t work as well as I had hoped and now know to continue looking at using some sort of rim for all of mu future teacups. This time I wanted to create a sample where I was using the gold cord I had also found at the shop.

  • Firstly, I drew and cut out the top and bottom pattern pieces that create the outside of the cup. I drew and cut out five tops and five bottoms. I added a 1cm seam allowance to the top parts of the tea cups also.
  • I then iron the fold for the seam allowance so when I attached all of the components together this will be sewn down as well.
  • Once I had done this, I got the bottom piece and then a top piece and pinned these together so I could then sew and attach the two pieces together. I repeated this for all five pieces until they were all attached like the images below.
  • Once I had attached all the top and bottom pattern pieces together I then pinned these together and began sewing them together. Once both of them had been completed and now created a circular shape of a tea cup,  I turned the tea cup the correct way to check that the stitching was okay and moved on.
  • This time I changed the way I made the cup. I used the new cord I had found along with the silver ribbon. I found some gold cord I will use this for this teacup to compare the two. This is shown with the images below.
  • I used then used the gold cord to create the bottom of the tea cup I made a circular shape with the cord and stitched this together. To make it easier for me and so that my teacup looked professional I did add some hot glue to attached the bottom to the tea cup, which has worked very well. It is also more hardwearing than just trying to stitch it on.
  • I then began looking at adding the lining of the teacup I have continued to use the plain white polyester fabric as it has proven to uphold all my previous attempts. I’m going to do six lining pieces again as this has worked best with my other cups rather than just using five. Once I drew them out and cut the pieces out, I began to sew these together as well.
  • I then used the same gold cord for the rim of the cup also as before I had the cord going around the rim of the cup. I then placed the lining inside of the cup to make sure that it fitted in nicely with the outer cup pattern pieces. Using pins I pinned the outside and inside so these were all sewn together. I used a light green machine thread to do this.
  • I then used hot glue to attach the gold cord to the rim of the cup which worked very well.
  • Next was looking at the handle. This time I also included the lovely gold cord. I used a little hot glue to attached the top half of the handle into the seam of the teacup, this worked very well in comparison to me sewing it on like previous attempts. I then brought the cord down to see where I would place the bottom part of the handle and cut the excess away and then used hot glue again to attach the bottom half of the handle to the teacup.

Here in the images below is the final outcome of this tea cup. I am very happy with the colour of the fabric and the change in fabric. although the gold cord worked well on the red tea cup I had previously handed in I believe that the silver ribbon works much better as it looks more elegant and dainty.