Speed Dating Recap: 3 Way Cording Foot

3 Way Cording Foot

Has three channels under back of the foot to accommodate up to 3 narrow cords (purchased or hand-made). Cords are held in place by  black clip at front.

Machine Settings

Tension: 4

I placed the cords into clip on front of the foot and run through corresponding channel under the back of the foot. This held them securely in place as I stitched along them. When using 2 or 3 cords each is held in place by an individual stitch once completed.

Speed Dating Recap: Piping Foot

Piping Foot

Used for both creating piping and stitching into a seam.

Machine Settings

Tension: 4
Stitch: Straight Stitch
Stitch Length: 2.5
Width: Adjust width dial to move the needle as close as possible to piping cord

I took a bias cut strip of fabric and then I fold it in half lengthways with piping cord running down the centre of it. I then placed it under the sewing machine foot. Making sure that the raw edge is on the right and the cord is on the left. I made sure that the needle was as close to the cord as possible and stitched all the way down using the straight stitch.

Once the piping is complete I then inserted it in between two pieces of fabric with all raw edges even. I then stitched down then making sure I was as close the the piping as possible. I then turned it inside out to show the result.

Corners
When sewing around a corner, snip seam allowance of piping up to the stitch line and curve around the corner making sure to stitch as close to the piping as possible.

Speed Dating Recap: Pintuck Foot

Pintuck Foot

Used with twin needle to straight or curved pintucks. Can be also be used with cord guide to cord the under side of the pintuck giving a firmer finish. There are 2 size feet (narrow and wide) which must be used with the corresponding cord guide, twin needle and thickness of cord.

Machine setting

Tension: 8
Stitch: Straight
Length: 2.5
Width: 0

The first stage is to place the cord through the cord guide, and guide this through to the back of the machine. I then placed the fabric over the top of the cord. Put the needle down and start sewing.

Above is a couple of photos of me actually doing the technique. The one of the right shows me adding a second piece of cord next to the first. I made sure that I lined the needle up exactly over the top of stitching from the first.
I not only tried stitching the cords close together I did curves and also overlaid the cords as well just to try different ideas.

Reverse Applique

Reverse Applique

This is another decorative technique but unlike applique you place the other fabric behind the first fabric and sew your desired shape and then using scissors cut away the top fabric.

Machine Settings:

Tension: 4
Stitch: Straight or Zig Zag
Length: 2 or depending on desired effect
Width: 2

Instructions

1. Use an  erasable fabric marker to draw the design on the fabric surface you want to place a reverse applique motif.  Place a contrasting fabric at the bottom of your design, secure both layers with pins.

2. Using a sewing machine using either straight line or zigzag stitch will be a good idea for reverse applique. Go around the markings of your design with the sewing machine.

3. After you have finished with the sewing, use a sharp point scissor to cut out ONLY the top fabric. You have to do this carefully and precisely, about 1mm-2mm from the edge of the stitching line.

4. This is how a reverse applique looks after removing the top fabric.


Paper mache tree

I have create a small maquette of a tree using paper mache. I started by scrunching up old newspapers that were in my recycling. I also went to local charity shops and collected old books to use for the paper mache. I then began adding layers and layers of the book pages, by ripping them up and adding watered down PVA glue. Once I had the main body of the tree, I then began scrunching smaller pieces of newspaper to create the branches of the tree. I then ripped up more of the books and began attaching them each of the branches to the main body of the tree. I then attached the tree to a book using PVA  and the pieces of the books to bind the tree and book together. Once I had left the tree to dry, I then focused on creating some leafs onto the tree by painting some book pages green and orange and then attaching these to the tree.

Koala Attempt

I cut out all of the pattern pieces that I would need to begin creating my 3D koala bear. I started off by attaching the first two body pieces together. Once I had attached them together I then began looking at the leg of the koala. At first I was very hopeful that this would be a good idea but as time and attempts went on I have found it more and more difficult. When I had finished sewing I turned the leg inside out so the stitching was on the inside now. This was hard as the leg was so slim and took a great deal of time.
I then tried adding the pad to the bottom of the foot. After a few attempts I did decide to abandon the idea and tried moving on to a different part of the koala such as the arm but I was having the same difficulties. I left the pattern pieces for the day and tried coming back to them but again I was struggling again and I have finally decided to abandon the idea of making the koalas as I need to use my time wisely. I have chosen to look at my embroidery instead.

Koala Pattern Pieces

As part of my exposure module I have wanted to focus my attention on the current events that have been happening in Australia and how climate change is becoming an ever growing risk to the planet. I want to take a look at creating three dimensional koala bears using found material to focus on how the textiles industry is impacting climate change and therefore contributing to the bushfires that are happening. 

I have spent time looking at different stuff koala bears and have taken these apart to see the different pieces that they are made up with, I have then gone on to create my own pattern pieces. In total there are eight different pattern pieces that hopefully make up the three dimensional bear. 

Mordanting Fabrics

Ingredients:

6g alum powder
6g cream of tar tar
Fabric

Method:

Wet the fabric that you intend to mordant to help loosen the fabric so that the mordant will attach itself to the fibres and get evenly to the fabric.

Weigh out your 6g of alum powder and the cream of tar tar and place these in a small pot and add some warm water to this to help dissolve the two powders.

Fill a pot up with water enough water so that the fabric can freely move around the pot. Bring the pot to a boiling point and then back down to a simmer.

Add the now dissolved alum and cream of tar tar to the pot and stir around the pot

Add the fabric to the pot and leave in the pot to mordant for about 45 minutes to an hour.

Take the fabrics out of the pot once the 45 minutes are up and then rinsing and hang to dry.

Natural Dyeing – Red Onion Skins

Ingredients to naturally dye onion skins:

100g of onion skins
6g of alum powder
6g of cream of tar tar
100g of dry fabric

Method:

Place the onion skins into a muslin bag or (reusable veg bag) then place these into a pot and cover with water generously. Bring to the boil and simmer for approximately 30-45 minutes.

Once you have a lovely colour in your dye pot, take the skins out and discard them.

When you have your mordanted fabric place this into the dye bath. There is no given time on how long you ‘should’ leave the fabric in but normally it is until the desired colour is reached.

Once the colour of the fabric is achieved then removed the fabric from the dye bath and then rinse these with water. Some of the dye will come out when rinsing the fabric this is normal. This is another reason to keep your fabrics in the dye bath longer as they will become lighter once rinsed.

With red onion skins you will get a lovely green colour to your fabric. Do not throw the dye away as you can repeatedly use this until all the colour has gone ( the fabric will become paler each time the dye bath is reused).

Natural Dyeing- White Onion Skins

Ingredients to naturally dye onion skins:

100g of onion skins
6g of alum powder
6g of cream of tar tar
100g of dry fabric

Method:

Place the onion skins into a muslin bag or (reusable veg bag) then place these into a pot and cover with water generously. Bring to the boil and simmer for approximately 30-45 minutes.

Once you have a lovely colour in your dye pot, take the skins out and discard them.

When you have your mordanted fabric place this into the dye bath. There is no given time on how long you ‘should’ leave the fabric in but normally it is until the desired colour is reached.

Once the colour of the fabric is achieved then removed the fabric from the dye bath and then rinse these with water. Some of the dye will come out when rinsing the fabric this is normal. This is another reason to keep your fabrics in the dye bath longer as they will become lighter once rinsed.

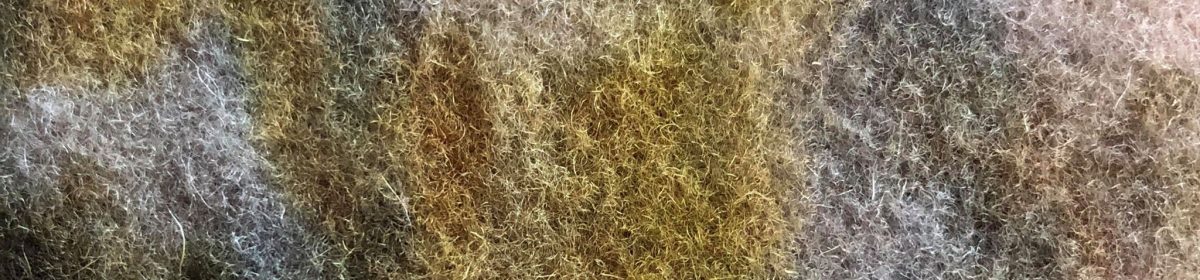
With white onion skins you will get a lovely golden yellow colour to your fabric. Do not throw the dye away as you can repeatedly use this until all the colour has gone ( the fabric will become paler each time the dye bath is reused).