Metal Box

One of our other rotations that we did was a metal workshop. I made a small box with a hinge.

The first stage of the process was to cut out the metal for the box. We chose to make a 15cm box. We used a giant metal cutting guillotine. The next step was to make a 4cm cut into the 15cm metal we just cut.

One my metal was at the stage on the right hand photo above. I then needed to bend the sides to make the box.

Once the bottom of my box was made, I then had to make the lid for the box. We had to do the same as before but make the metal 10cm and the cuts on the edges which were 1cm. Then fold the sides like with the bottom half of the box. 15369884_1039311662847511_563126940_o

The next stage now was to attach a hinge to the box so that I could open and close the lid. We used the metal spot welder to do so. This is a lot stronger than the spot welders that are up in the small metal department. This is also the final outcome of the box.

Mould making and wax casting

On one of our rotation weeks we were making moulds and then making wax casts of them once the moulds were complete.
The first stage was to chose an object which in my case I chose a balloon and filled it with water. I then rolled out clay to fit around the balloon.

Once I had done the clay. I had to prepare the silicone to pour into the clay that I have just prepared. The first step is to cut the silicone up into small piece and fill the jug up. Once finished we had to put the silicone into the microwave for two minutes. Once done we had to mix the contents around and then put back in for another two minutes, and repeat the last step. Then for a last time put the silicone in for a minute and the mixture should have turned into liquid.

The next stage was to pour the mixture into the clay you have to make sure that the silicone has completely covered the balloon.

I then needed to wait for the silicone to cool down and set. I was just worried that the silicone would be that hot that it may pop the balloon. I’m hoping that because I have added cold water inside the balloon that it won’t pop.

Once my mould was now ready and I had removed the balloon from the inside. It was now time to start the casting stage of the process. This part we had to melt wax down until it was liquid form. Then we had to transfer the wax from pan to pan to help cool the wax down a little.

The next stage was to pour the wax into our moulds. Then swirl it around the mould so the wax has evenly spread around the mould. Then pour the rest of the wax out and repeat this stage a few time until there is a really nice thickness to the cast. Once done submerge the mould and wax into water to help the wax cool before removing.

The next stage was to then take the cast out without breaking it. I was really happy with the outcome. The details on the knot I made on the balloon is amazing and I’m really pleased with the outcome.

Blue stitch ball

I chose to use the circle pattern again on this as I really enjoyed doing so last time. Also it reminds me of the hot glue gunned balloons I have been making. This time I used a dark blue stitch for the straight stitch and a light blue for the zig zag stitch. This time I decided to use the zig zag stitch inside of the circles but also around the straight stitch. 15387639_1039337712844906_1833229418_o
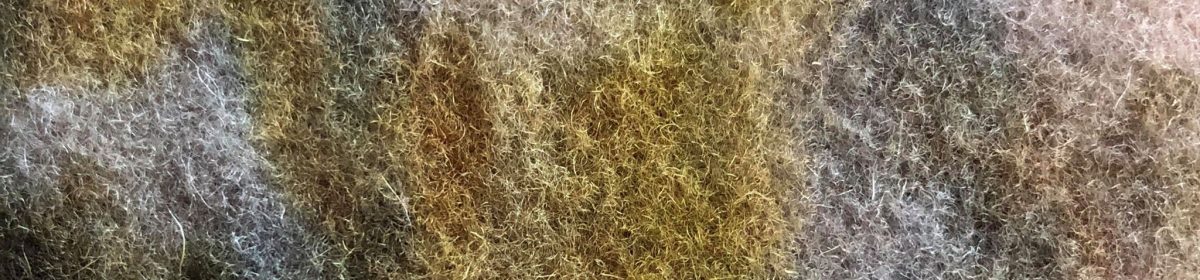
I really love the two colours together they really compliment each other and the shine they both give off is a really nice affect. I made a much large piece for this one as my intention is to shape this one around a balloon. This is a different process to the last time I did this technique. 15397613_1039311319514212_1627420983_o

This is the final outcome of all my stitching. I left some little holes to see how it would look. I didn’t want to have the piece completely covered in stitch.
The next stage was for me to cut closely to the stitching as possible. I then filled a bowl of water and dipped the piece into the water. Rubbing on the stitching the remove the glue from around the edges. You shouldn’t leave this in the water longer than 15 minutes.

15369759_1039311289514215_1827096719_o

The next stage of the process was to prepare the object in which I was moulding the stitch around. I blew the balloon up and then added fairy liquid to the balloon so that the stitching doesn’t stick to the balloon. Then I placed the stitching onto the balloon. I then left this for about a day.

This slideshow requires JavaScript.

Once the stitching was completely dry and then I slowly let the balloon down so that the stitching didn’t lose it shape.

This was the outcome. I am really pleased with how the stitching has moulded to the shape of the balloon.


Working with dissolvable

I chose to carry on with stitch workshop over CAD as I was going to do a textiles course but chose to do the maker course so that I am able to work with different materials and explore and experiments with techniques and processes I’ve never worked with before.

I started to work with dissolvable. Dissolvable is like a sheet of glue in which you can stitch into. You have to use embroidery threads to do so. I started off by using red thread to try the technique out.
When stitching into the dissolvable you have to do a straight stitch first. The next step is to make sure you stitch back over the straight stitch with a zig zag stitch so when dissolving the glue the straight stitch won’t just fall apart there will be a strong structure. 15310987_1039343789510965_1617955222_o

Here you can see I did a simple circle pattern, as this was only a sample to try out the technique. This is an up close photo of my straight stitch.

15322469_1037860026326008_342548679_o

Once I had finished doing the straight stitch on my design, I then moved on to do the zig zag stitch. You can see a noticeable different in the thickness of the thread. Once I had gone over all of the straight stitch I was ready to dissolve the glue.

15354234_1039343846177626_1988189059_o Once finished I cut off the excess glue and placed my two swatches in the water. You then have to leave them for about half an hour so that all the glue has dissolved. One thing I noticed when the glue had dissolved the structure started to fold into itself. I know what I will do for the siteless piece when I begin designing.

Siteless

The idea for my siteless project came from when I took a trip with my boyfriend over to The Knap a pebbled beach not to far from where we live. As I was sat on the pebbles I can see myself just stacking them on top of each other. I had the idea to create this form looking at the different ways I was balancing the pebbles on top of each other.15354192_1037942899651054_323495515_o
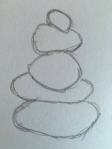
I then took some of the pebbles home with me to carrying on studying and make observational drawings of them. Here is one of the photos of me doing so. The second time I went back to The Knap, there were leaves everywhere, where the Autumn had started to happen and the leaves where all over the beach.
This gave me the idea to have an Autumn colour scheme for my project. By doing this I felt that when making my project that it wouldn’t resemble the stacking of stones and would make viewer wonder what they could possibly be.

I then began my making I places squares of wool roving onto the floor with paper towels on the back so that the dyes and water wouldn’t go onto the floor. I then began by sprinkling brusho powder onto each square. The brusho only reacts once I have added water to it. 11199026_708422319269782_146737494_n
I carefully added the colours I wanted to each square. When the brusho was on it was hard to tell what colours I had added to each square as the pigments are similarly coloured for the greens, oranges and yellow, so it was a matter of waiting to add the water to see. This is one of the photos taken of me experimenting with the brusho on the felt.

Once I had added the brusho to all the the wool roving. I then began adding the brusho to each of the squares. I didn’t just pour water onto each square. I carefully sprinkled water onto them using my finger and then with the palm of my hand would push onto the square to move the water around to all the pigments would react to the water. As brusho is a water based pigment. Once I had added the water to all of my samples I had to wait until they had all dried ready to pva to a balloon.

15369775_1037940846317926_669695041_o

Whilst I waited for the samples to dry I blew some balloons up all different sizes to resemble the different size pebbles. Once the squares had dried I mixed the pva with some water so the paste wasn’t as thick.
I placed each of the squares on each balloon and using a paint brush glued the wool roving to the balloons. If there wasn’t enough on one of the balloons I would take some of the wool roving from other squares to make the difference up. Once I had completed a balloon I attached string to each one and then attached it to my clothes horse so that it could air dry. I had to place a plastic sheet underneath them as the Pva was dripping from the balloon onto the floor.

This slideshow requires JavaScript.

These took at least 4 days for some of them to dry. The last few I did, I ended up using a hair dryer to dry some of the wet that was still on the balloons. Once I had all the balloons dry, I used scissor to cut the balloon and slowly  let the air out. Some of the balloons came out very easily were some of the other didn’t and i had to rip the balloon out which did rip some of the felt but I like the distressed look so I didn’t mind as much. 15354067_1037941859651158_517153106_o

I have all my felt balls now. I started to play around with them and decide how I was going to stack them and which colours looked good with each other. Once I had chosen which ones I was stacking together I used suer glue to stick them together as I couldn’t find anything as strong to keep them held together.
These are my photos of my finished pieces. I am really pleased with the outcome of them and think the colours look really good and have blended well together.

This slideshow requires JavaScript.


Reflecting on how an understanding of the birth of the industrial and economic paradigm is important in my own practise?

As a maker and also a textiles student the birth of the industrial and economic paradigm was a massive impact to the textiles industry. John Kays created the wheeled shuttle in 1733, which meant that weavers were now doubling their productivity than doing this by hand. This creation was the beginning on the textiles industrial revolution. Now today we have sewing machine that run from electricity rather than doing so by hand. This increased productivity and most textiles products can be massed produced now where as before the industrial  revolution doing so by hand would of took hours, days, weeks and even months to create a large batch of the same product. With new technology being created every year, this is making it possible to create my work at a faster rate. This has a massive impact on my work as now I can stitch together a piece of fabric within minutes where as before the revolution I might of spend our hand stitching to create the same high quality sustainable stitch. Having the technology we have now because of the revolution means that there is new and exciting products being created everyday. With the economy moving as faster than ever there is always going to be a demand for new products. Creating new ideas as your last idea is being produced. With my practice I love testing materials to their limit and having all this wonderful technology around me I am able to do this. For example the hot glue gun. I tested the limit of a balloon by adding hot glue onto the balloon which created these beautiful forms that I fell in love with. This would never been possible if it wasn’t for the fast moving revolution. Even so we are still moving forward and creating. Finding new ways to move forward. As will my practice.

Slip Casting

We started our first introduction, which my group are doing slip casting. We chose an item we wanted to cast and bring it in. Step one was to take your object and place it on a board. If like my object it is round you have to add a little clay to keep it in place.


The next step is to find the middle of the light bulb. I did this by using a square ruler and drawing along the side with a wax pencil and rubbing it across the light bulb. You can see this above on the right.

Here I started to build up the clay to the middle line that I drew around the bulb. I had to make sure that the clay was two fingers thick all the way around, to make sure that the mould will be strong and won’t break due to being to thin. Once I had build the clay outwards and upwards, I began to smooth all the edges and the surface so they are nice and flat.

14572061_978355645609780_1291837439_o

You need to make a spout for when the mould is compete and I need to pour the slip into the mould to make my cast. The picture above shows my spout for my light bulb. You can put a spout anywhere, but I thought the perfect place was at the bottom.

Here I added boards around my piece. This is where I will pour the plaster into to create half of the mould. In the corner of the board, on the outside I added clay so that no plaster slips out when I poured it. It also keeps the board secure so that they don’t move.

Once my mould was finished I then had to prepare the plaster to pour. I needed 4 pints to fill my mould. I needed to fill my bucket up with 4 pint of water and then from the plaster ratio it says I need 3KG of plaster. Once I had the plaster I didn’t put it all in at once i shock little bits in at a time, so that the plaster is evenly spread at the bottom of the bucket. Then left it for 2 minutes. I then put my hand in the water and plaster and wiggled my hand underneath until I could make a figure of 8 on the surface and it stay for a second. This is the perfect time to pour the plaster. Whilst doing this I was removing all the bubbles that were on the surface of the plaster. I then carried my plaster over to my mould. Putting one of my hands over the boards, I poured the plaster through my fingers onto the light bulb. After the plaster was in the boards, using the back of my hand I pattered the plaster so any remaining bubbles came to the surface.

14599879_978355918943086_2108986007_o.jpg

I then gave the plaster around 20 minutes to set. At this point I then began to take the boards from around the mould. My next task was to take all the clay that was around the light bulb, but leaving the spout clay in. You need to leave the bulb in for the next part. I then cleaned around the bulb ready into the next step.


Visit to Craft in the Bay

14439013_977329422379069_116840754_o (1).jpg

The Makers had a trip over to Cardiff Bay to the Craft in the Bay Gallery. Cardiff is a beautiful city which much to offer for aspiring young artist and designers. The bay is a beautiful place. Craft in The Bay is free for anyone can go around and have a look at the amazing art and craft by local artists. The gallery is operated by a charitable organisation called the “Makers Guild In Wales” which helps local makers, artists and crafters exhibit their work.

Beate Gegenwart

One of the artists that caught my eye whilst at craft in the bay was the metal artist Beate Gegenwart. One thing that stood out the most for me is how something so small can be so beautiful. The details Gegenwart has applied to each of her pieces is breath taking. I particularly love the piece on the left. Due to the sun I couldn’t get a good photo from another angle. This was the best photo I could get. I really liked the form on the handle of the cup. I have been very interested in form since doing my foundation year. 14536586_977329499045728_1020617981_o

Genenwart is a metal artist and her principal medium is enamel. The techniques that Gegenwart uses I have never done these myself. I hope that in my first term I will be able to have an introduction into this technique, I would love to see the different forms I would be able to produce and see if this a new area I may be able to develop my maker skills into. 14536897_977329519045726_607717533_o
These are a few more of Gegenwart’s work. I find these equally as beautiful as the steel works that are exhibited to the right of them. I feel that these pieces of work are even more beautiful knowing all the time, skill and devotion that has gone into these piece. The photograph I have taken of the pieces may make them seem bigger but once you experience them in person you will just see how small and detailed they really are as I said earlier they are breath taking.

Helly Powell 

14572689_977330009045677_294273850_o.jpg

On my visit I also found these wonderful pieces at the bay. The artist refers to them as Fauxidermy. Faux comes from the french language and mean false. Making a faux objects, an attempt to resemble an item as closely as possible. Taxidermy comes from the Greek language for arrangement of skin. Which is an art now for preparing, stuffing and then mounting skin of dead animals for display on a wall. Many do this as a trophy for the animal they have hunted and killed.

The interest for this sparked as the materials used look like recycled fabrics from old furniture. I feel strongly about recycling regardless if it’s fabrics or recycling your food waste. With all the articles in newspapers and on facebook as well talking about hunting. I think this makes a statement. You don’t have to kill a beautiful animal to display on your walls. These pieces are helping the environment but also saving lives of innocent animal, that should be looked at as trophies. I feel these mounted pieces speak abut so many issues. I’m not 100% sure if the fabrics used are recycled, but they seem like they are.

Foundation Year

11204873_705677792877568_1782875660081902560_n

Whilst at the art academy I loved experimenting with different materials and testing them under different circumstances. Here I was shredding wool roving to make swatches. I then add brusho powder to each swatch and flicked water onto the brusho. This was the outcome. The colours were so vibrant.

11355637_717461851699162_1044556172_n.jpgOnce I had finished preparing all of the brusho swatches I left them to dry. Then I blew my 3ft balloon up. As you can see in the above photo you can see all my swatches in a pile next to the balloon. I then painted watered down PVA glue to the balloon, I then began apply my swatches to the balloon. I then added another layer on PVA glue to the top and repeated this until the whole of the balloon was covered over. The photo below shows the balloon drying off from all of the PVA. 11330482_717461771699170_1269865634_n

I then popped the balloon and peeled the balloon from inside the dried felt balloon. As a result to there being alot of air in the balloon, once I popped it the wool roving I glued to the balloon sucks inwards creating an unusual form. I hung the balloon up and put a light inside the results are below.

11358699_717461605032520_463849691_n11329614_717461568365857_904376062_n

First blog post

This is the post excerpt.

Hi I want to welcome you to my blog. This is a way I can bring you along with me on my university jounry and what I am going to be creating along my three years. I will be trying to blog daily if not every couple of days so feel free to check back in weekly. Enjoy my work and watch how my textile design develops and grows over the next three years. I hope you enjoy all of my projects.

IMG_2942.jpg